Reusable Frosted-Glass UI Panel in Godot 4.x (Inspector-Driven, Shader enhanced)
Here's my step-by-step walkthrough for making a reusable frosted-glass UI panel in Godot 4.x. This is mainly for my own notes, but if you're here, maybe it'll save you some time too. I wanted to drive as much as possible through the inspector to make it easy to tweak and customize. The blur effect is created using a custom shader script. It's clean, flexible, and meant to work across different screen sizes without headaches. Feel free to copy, tweak, and make it your own.
Time Required: 10 – 15 minutes
Prerequisites:
- Godot 4.x installed
- Basic familiarity with the Scene dock & Inspector
1. What You'll Build
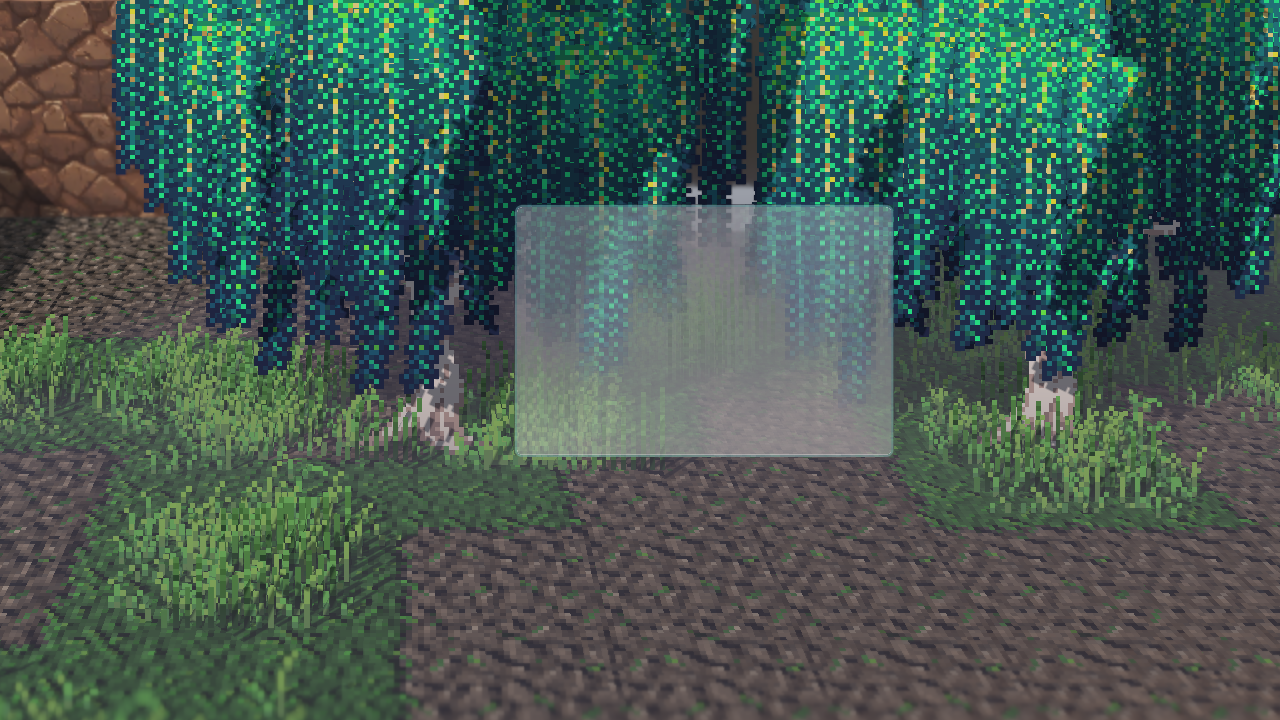
A reusable frosted-glass UI panel:
- Live blur of the scene behind it
- Adjustable transparency & tint
- Rounded corners + colored border
- Zero code after the shader
2. Quick-Start Guide
2-1 Create the Scene Structure
- File → New Scene
- Select Control as root → rename GlassPanel
- Add children in this order:
Panel→GlassPanelPanel
Control→ContentContainer
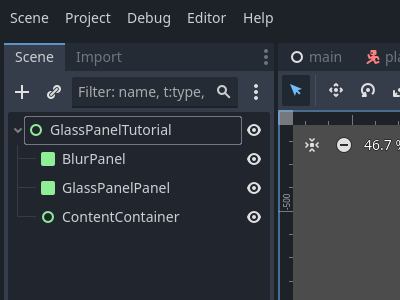
Why order matters — BlurPanel renders first, GlassPanelPanel adds the glass styling, ContentContainer sits on top for your UI.
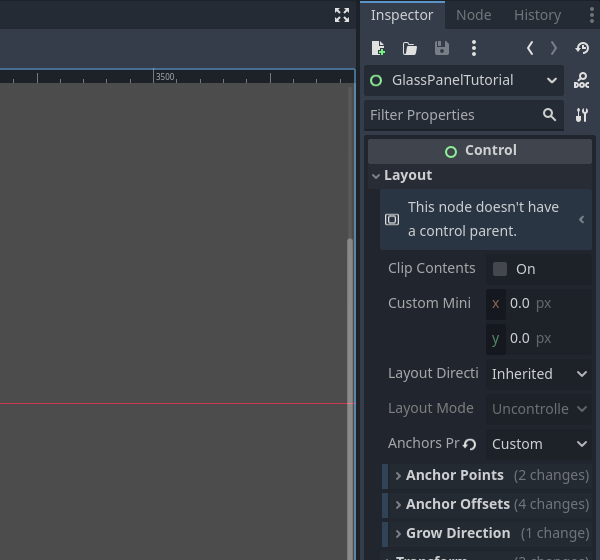
2-2 Position & Size the Root Panel
Select GlassPanel → Inspector → Layout → Anchors Preset → Custom
| Field | Value |
|---|---|
| Anchor Left / Right | 1.0 |
| Anchor Top / Bottom | 0.0 |
| Offset Left | -300 |
| Offset Top | 50 |
| Offset Right | 0 |
| Offset Bottom | 200 |
| Grow Horizontal | Left |
💡 Resize on demand — tweak the four offset values (or even anchor points) any time to change size and placement.
2-3 Full-Rect the Children
Select BlurPanel, GlassPanelPanel, ContentContainer → Layout → Anchors Preset → Full Rect.

2-4 Create the Blur Shader
- FileSystem → New Resource → Shader → save glass_blur.gdshader
- Paste the Gaussian-blur code (see Appendix).
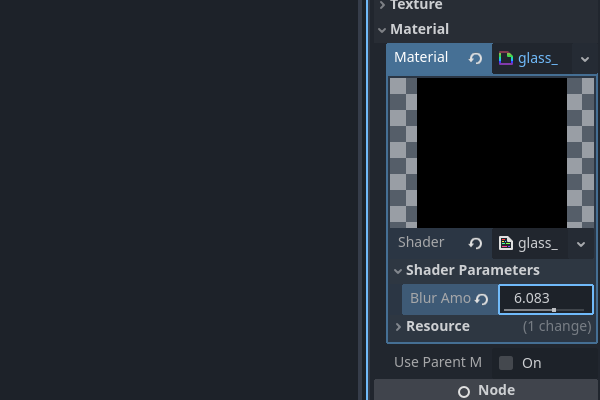
2-5 Create & Apply the Shader Material
- FileSystem → New Resource → ShaderMaterial → save glass_material.tres
- Inspector → assign glass_blur.gdshader
- Set blur_amount = 2.0
- Drag material to BlurPanel.
2-6 Test the Blur
Temporary setup — Add a Node2D as new root, put a colorful ColorRect behind GlassPanel, then F5.

If the panel is clear, double-check: material assigned, blur_amount > 0, something colorful behind the panel.
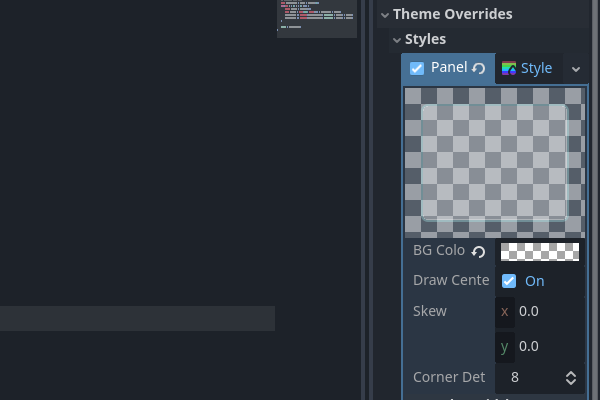
2-7 Style the Glass
- Select GlassPanelPanel
- Inspector → Theme Overrides → Styles → Panel → New StyleBoxFlat
- Configure:
- BG Color: white @ Alpha 0.2
- Border Color: light blue @ Alpha 0.3
- Border Width: 6 (all sides)
- Corner Radius: 20
2-8 Final Test
Run F5—you should now see blur + rounded, tinted glass.
3. Helpful Hints
- Adjust sizes anytime via the root panel's offsets.
- Inherited scenes → Scene → New Inherited Scene from
GlassPanel.tscnto create variants with unique size, position, or content—no prefab duplication.
4. Common Positions
| Position | Anchors | Offsets (L,T,R,B) | Grow Horiz |
|---|---|---|---|
| Top-Left small | 0,0,0,0 | 50 50 300 200 | Right |
| Centered | 0.5 0.5 0.5 0.5 | -150 -100 150 100 | Both |
| Bottom full-width | 0 1 1 1 | 0 -150 0 0 | Both |
5. Styling Presets
| Use Case | BG Alpha | Border Width | Blur |
|---|---|---|---|
| Subtle HUD | 0.1 | 2 | 1.0 |
| Prominent Menu | 0.3 | 8 | 4.0 |
| Dark Theme | Black @ 0.2 | Dark @ 0.5 | 2.0 |
6. Performance Notes
- Keep blur_amount ≤ 5 on mobile.
- Re-use one ShaderMaterial across panels.
- Animate opacity, not blur, for cheap fades.
7. Troubleshooting Cheatsheet
| Symptom | Fixes |
|---|---|
| Panel invisible | Check anchors/offsets, StyleBox assigned, on-screen position |
| No blur | Material on BlurPanel? blur_amount > 0? Something to blur behind it? |
| Wrong position | Revisit anchor math; remember negative offsets move inward |
8. Anchor Crash-Course
- Anchors (0-1) = relative position on parent.
- Offsets (px) = distance from that anchor.
- Grow Direction decides which edge stretches.
Responsive UI in Godot is 90% anchor logic—master this panel and the rest comes free.
9. Next Steps
- Drop buttons & labels into ContentContainer.
- Animate panel fade-ins.
- Duplicate via inherited scenes for multiple HUD elements.
Save the scene as GlassPanel.tscn and make it your go-to glass component.
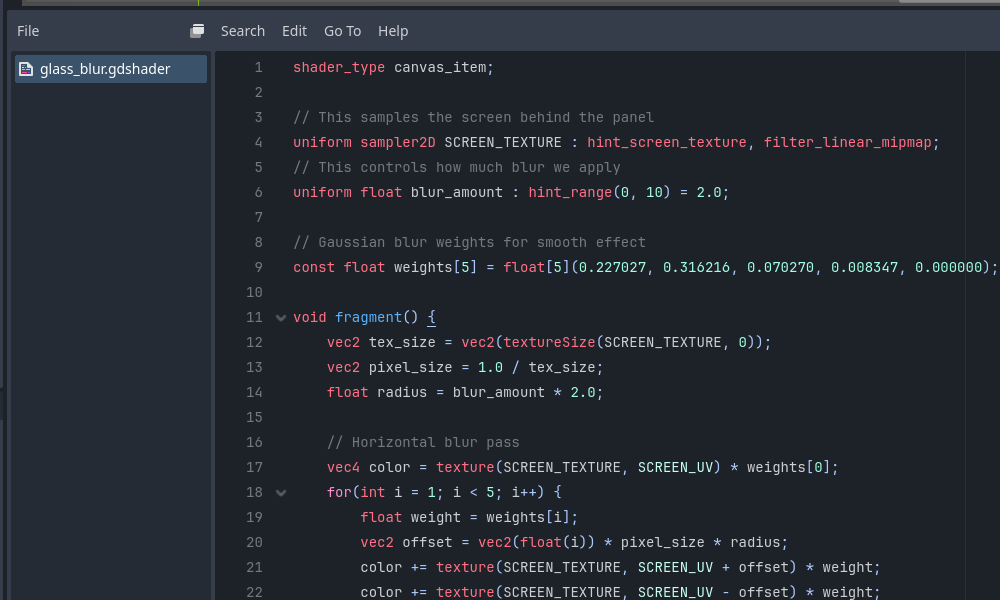
Appendix: Full Shader Code
This is the complete Gaussian blur shader for the glass_blur.gdshader file. It samples the screen behind the panel and applies a two-pass blur that can be adjusted in the Inspector.
shader_type canvas_item;

// This samples the screen behind the panel for the blur effect
uniform sampler2D SCREEN_TEXTURE : hint_screen_texture, filter_linear_mipmap;
// This controls how much blur we apply (0 = no blur, 10 = maximum blur)
uniform float blur_amount : hint_range(0, 10) = 2.0;

// Gaussian blur weights for smooth, professional-looking blur
const float weights[5] = float[5](0.227027, 0.316216, 0.070270, 0.008347, 0.000000);

void fragment() {
    vec2 tex_size = vec2(textureSize(SCREEN_TEXTURE, 0));
    vec2 pixel_size = 1.0 / tex_size;
    float radius = blur_amount * 2.0;

    // Horizontal blur pass
    vec4 color = texture(SCREEN_TEXTURE, SCREEN_UV) * weights[0];
    for(int i = 1; i < 5; i++) {
        float weight = weights[i];
        vec2 offset = vec2(float(i)) * pixel_size * radius;
        color += texture(SCREEN_TEXTURE, SCREEN_UV + offset) * weight;
        color += texture(SCREEN_TEXTURE, SCREEN_UV - offset) * weight;
    }

    // Vertical blur pass
    vec4 final_color = color * weights[0];
    for(int i = 1; i < 5; i++) {
        float weight = weights[i];
        vec2 offset = vec2(0.0, float(i)) * pixel_size * radius;
        final_color += texture(SCREEN_TEXTURE, SCREEN_UV + offset) * weight;
        final_color += texture(SCREEN_TEXTURE, SCREEN_UV - offset) * weight;
    }

    COLOR = final_color;
}